Everything that happens on the grid is decided half an hour earlier, in the wood you chose and the fire you built. Get this part right and the rest is tongs and confidence.
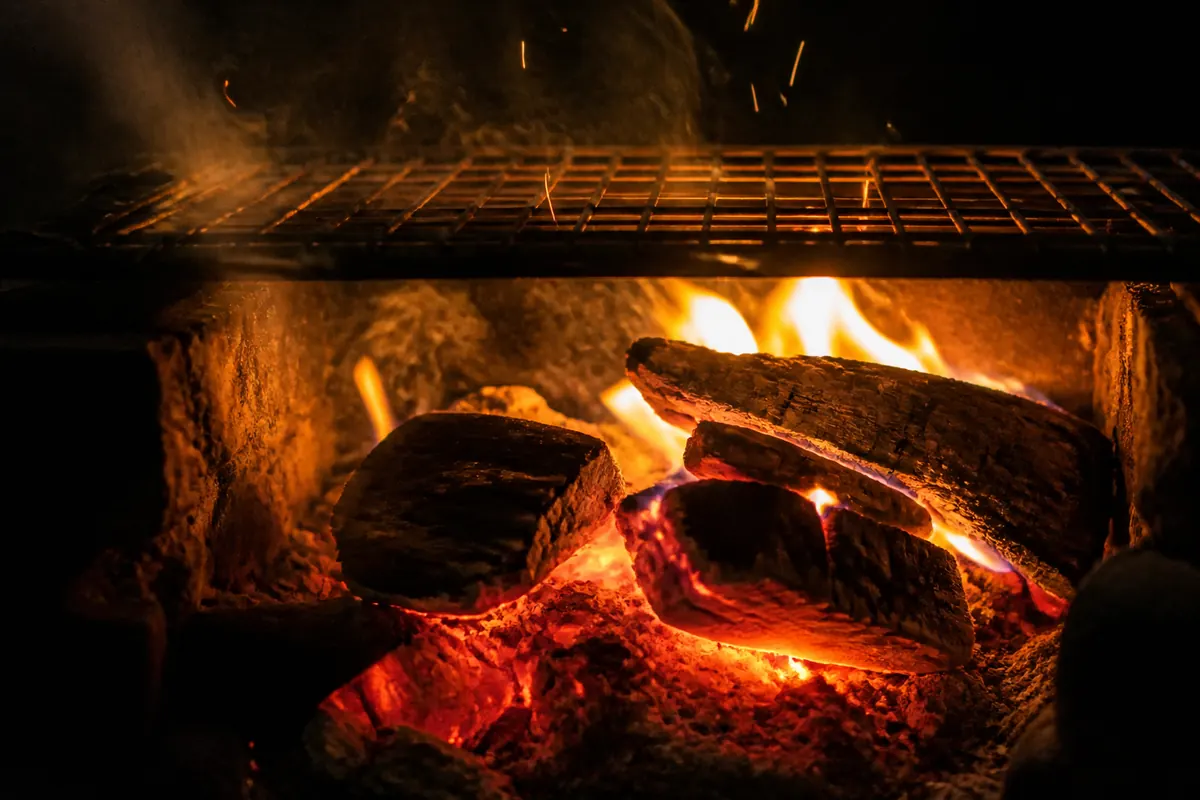
Flames are for show. This — halfway to coals — is where the braai begins.
Choosing your wood
Ask ten braaiers, get ten sermons. But the fundamentals are simple: dense hardwood burns long and settles into hot, long-lasting coals; soft or resinous wood burns fast, flares, and leaves you nursing a lukewarm grid. This is what you're choosing between:
Wood
Coals
Burn
The honest verdict
Kameeldoring
Exceptional — dense, hot, long-lasting
Slow
The gold standard for a serious braai. Costs more; worth it when the meat matters. Buy from a reputable, permitted supplier — this is a protected tree, and legal stock is part of being a good braaier.
Rooikrans
Very good — hot and steady
Medium
The Cape's workhorse. It's an invasive alien, so burning it is practically an act of conservation. Lights easily, smells right, priced right.
Sekelbos
Excellent — dense and fragrant
Slow
The bushveld favourite. Wonderful aroma, serious coals. If you find good sekelbos, don't tell too many people where.
Bluegum
Decent
Fast-ish
The budget option. Burns hot with more ash and less staying power — fine for wors and a weeknight fire.
Vine stumps (wingerd)
Good, quick
Fast
Fragrant and fast to coals — lovely for tjops and quick fires in wine country.
Briquettes
Consistent, even heat
Long
No romance, no surprises. Perfectly honourable for a midweek braai; keep real wood for the weekend.
Charcoal
Quick, hot, short-lived
Fast
Ready in 20 minutes, gone in 40. Good for a fast fire, thin cuts and impatient stomachs.
Never burn: treated, painted or laminated timber, old pallets (usually chemically treated), and resinous pine when food is involved. If you don't know what it is, it doesn't go under your meat. And wet wood doesn't burn — it sulks.
Building the fire
You need three things: air, patience, and more wood than you think. The classic method has not been improved upon:
Start small. A couple of firelighters or a handful of dry kindling in the middle of the braai. (Yes, firelighters are allowed. The one-match purists may object — they may also wait for their own fire.)
Stack for air. Build a loose teepee or log-cabin of smaller wood over the flame. Fire breathes; don't smother it.
Feed it up. Once it's roaring, add your big logs. Then step back and do the important work: standing around it with something cold, discussing matters of national importance.
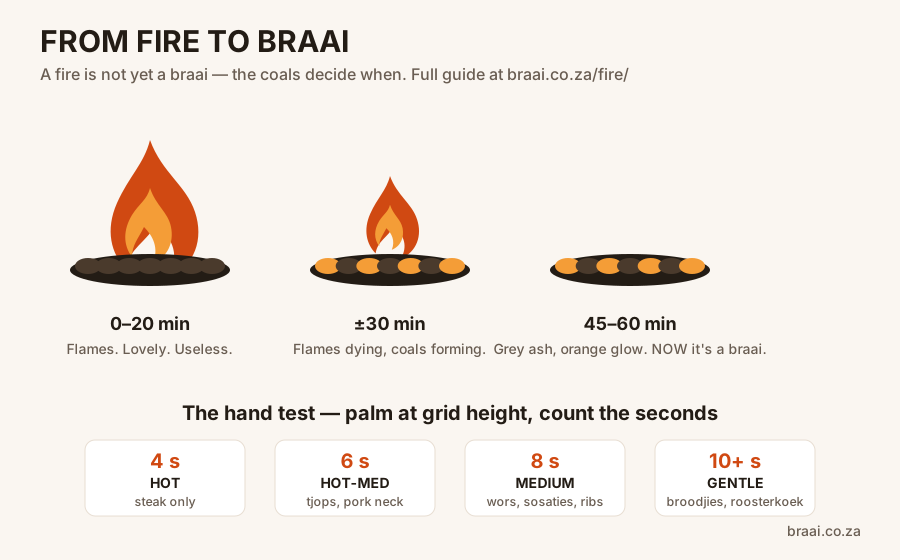
Wait properly. Good hardwood needs 45–60 minutes to break down into coals. If there are still flames licking up, it's a fire — not yet a braai.
Home-made firelighters — a thrifty classic from this site's 2011 tips archive that still beats the shop kind: pack the cups of a cardboard egg box with tumble-dryer lint, sawdust or pine needles, pour melted candle-stub wax over, and tear off a cup per fire. Cotton-wool balls worked through with petroleum jelly do the same job and store forever in a jam jar. Both light with one match, burn for minutes, and cost approximately nothing.
From fire to braai in three stages — then let your palm read the coals.
Reading the coals
The coals are ready when the flames have died and everything wears a coat of grey ash with a deep orange glow underneath. From there, use the oldest thermometer in the world — your hand, held palm-down at grid height:
You can hold it for…
The fire is
Braai this
4 seconds
Hot
Steak — hard sear, quick cook. Too fierce for almost everything else.
Boerewors, sosaties, ribs, snoek — the workhorse fire.
10+ seconds
Gentle
Braaibroodjies, roosterkoek, keeping things warm without regret.
Braai Day, Thursday 24 September. Light more hardwood than the crowd thinks you need, from a permitted supplier, and give it 45–60 minutes to grey-ash coals. Bank two zones. This hand test is the whole thermometer: 8 seconds for wors, sosaties and snoek; 10 or more for braaibroodjies and roosterkoek. The firing order is the Braai Day menu pack. The day itself is National Braai Day.
The two-zone fire
The single most useful trick in braaiing: don't spread your coals evenly. Bank most of them to one side for a hot zone, leave a thinner layer (or none) on the other. Now you can sear on one side, finish gently on the other, and rescue anything that's cooking faster than your guests are arriving. The cool zone is also where the braaibroodjies live, and where wors waits without turning to leather.
Tools that earn their place
Long tongs (your forearm hairs will thank you), a sturdy adjustable grid, a hinged toeklap-rooster for broodjies and fish, a wire brush for the grid, a small spade for moving coals, and a bucket of water or sand within reach — for the fire, not for the meat. That's it. The 48-piece stainless braai tool set stays in the box it was gifted in.
On the subject of gas
Let's be adults about this. A gas braai is a stove that lives outside — quick, clean, controllable, and very useful on a Tuesday. But it makes heat, not coals, and the coals are where the flavour and the ceremony live. Our ruling: gas for convenience, wood for the occasion. If that offends you from either direction, we're comfortable with that.
Top 10 braai tips
The distilled version — this page's greatest hits plus the hard-won rest, in the tradition of this site's original 2011 top-ten:
Make more coals than you need. A second fire burning alongside is insurance you can't buy afterwards.
Two zones, always. Bank the coals to one side; the cool side rescues everything.
Trust the hand test, not the clock: 4 seconds hot, 6 hot-medium, 8 medium, 10 gentle.
Meat out of the fridge 30–45 minutes early. Cold meat and hot coals don't negotiate.
Tongs, never a fork. Pierced meat donates its juice to the fire, which did nothing to deserve it.
Clean the grid hot, brush it, oil it. Everything sticks to a dirty cold grid, including your reputation.
Don't press, don't fuss. Pressing steak squeezes out the good part. Turn seldom; leave it alone.
Flare-ups: move the meat, don't pour water on your coals. You spent an hour making those.
Rest the meat under foil for five minutes; braai the broodjies over the dying coals while it rests. Perfect sequencing.
Feed the braaier. Quality control requires samples. This is science.
Safety, quickly
Mind the wind before you light. Keep the fire away from thatch, overhanging branches and unsupervised children. Fat flare-ups are managed by moving the meat, not by pouring water on your coals. And ash stays in the braai until it's stone cold — more veld fires have started in "cold" ash than anyone cares to admit.
Questions the fire actually gets
What is the braai hand test?
Hold your palm at grid height above the coals and count. Four seconds is hot: steak, a hard sear, too fierce for almost everything else. Six seconds is hot-medium: lamb tjops, pork neck steaks, spatchcock chicken with care. Eight seconds is medium: boerewors, sosaties, ribs and snoek. Ten seconds or more is gentle: braaibroodjies, roosterkoek, and keeping food warm.
Which wood should you burn for Braai Day?
Dense hardwood that settles into long coals. Kameeldoring is the gold standard and a protected tree, so buy it from a permitted supplier. Rooikrans is the Cape workhorse and an invasive alien, so burning it is a small act of conservation. Sekelbos is the bushveld favourite. Good hardwood needs 45–60 minutes to become coals, and a Braai Day crowd needs more wood than you think.
How long until braai coals are ready?
Good hardwood needs 45–60 minutes. If flames are still licking up, it is a fire, not yet a braai. The coals are ready when everything wears a coat of grey ash with a deep orange glow underneath. Then use the hand test, not the clock.